
Hand-Sewn Felt Patch
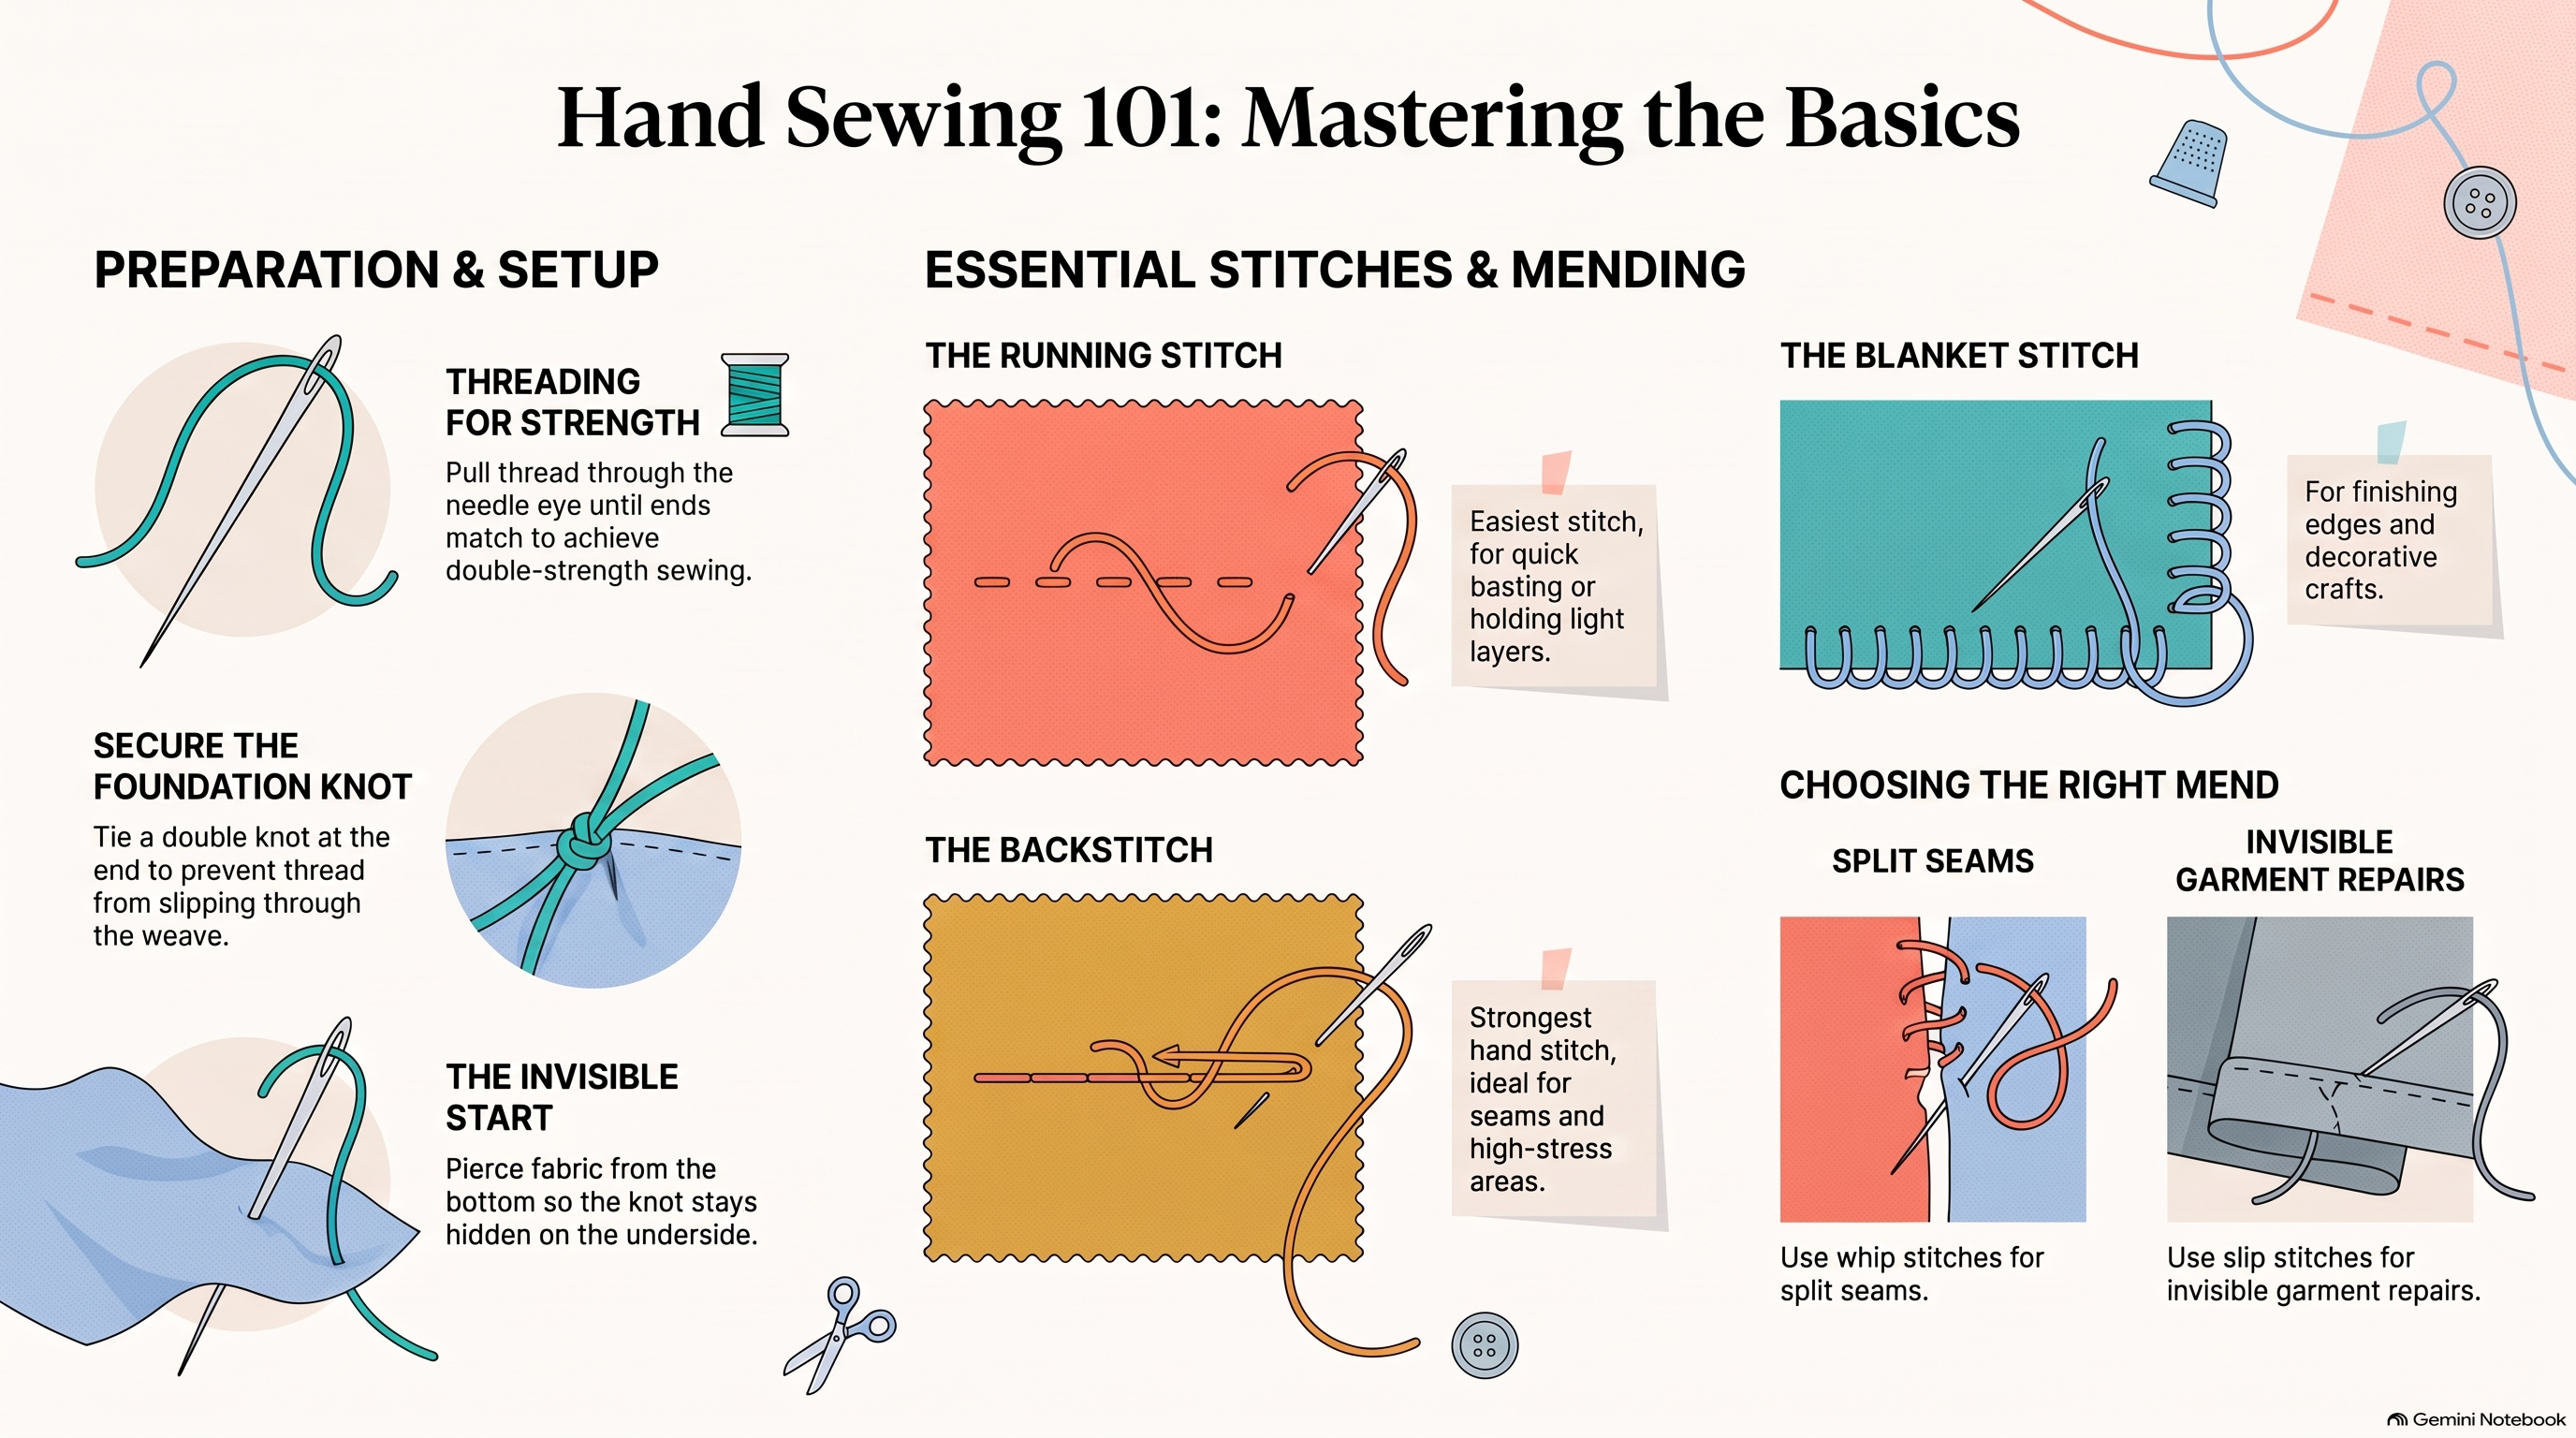
Now you're applying your stitching skills to real design work. Using your Unit 1 identity icon as the design source, you'll cut felt shapes and sew them onto a background felt piece to create an appliqué patch. The patch should be 4x4 inches and use at least 3 different stitch types and 3 colors of embroidery floss. Think about which stitches work best for different parts of your design — outlines, fills, details, and edges all call for different techniques. Use the Running Stitch for quick basting and holding layers in place. Use the Backstitch for strong outlines and seams. Use the Blanket Stitch to finish and decorate felt edges. Use the Whip Stitch to join two felt pieces together along an edge. For mending or joining split seams, use whip stitches; for invisible repairs, use slip stitches.
Reference: Hand Sewing 101
Objectives
- 1Patch must be 4x4 inches on background felt
- 2Use your Unit 1 identity icon as the design source
- 3Incorporate at least 3 different stitch types
- 4Use at least 3 colors of embroidery floss
- 5All felt edges must be secured — no fraying or loose pieces
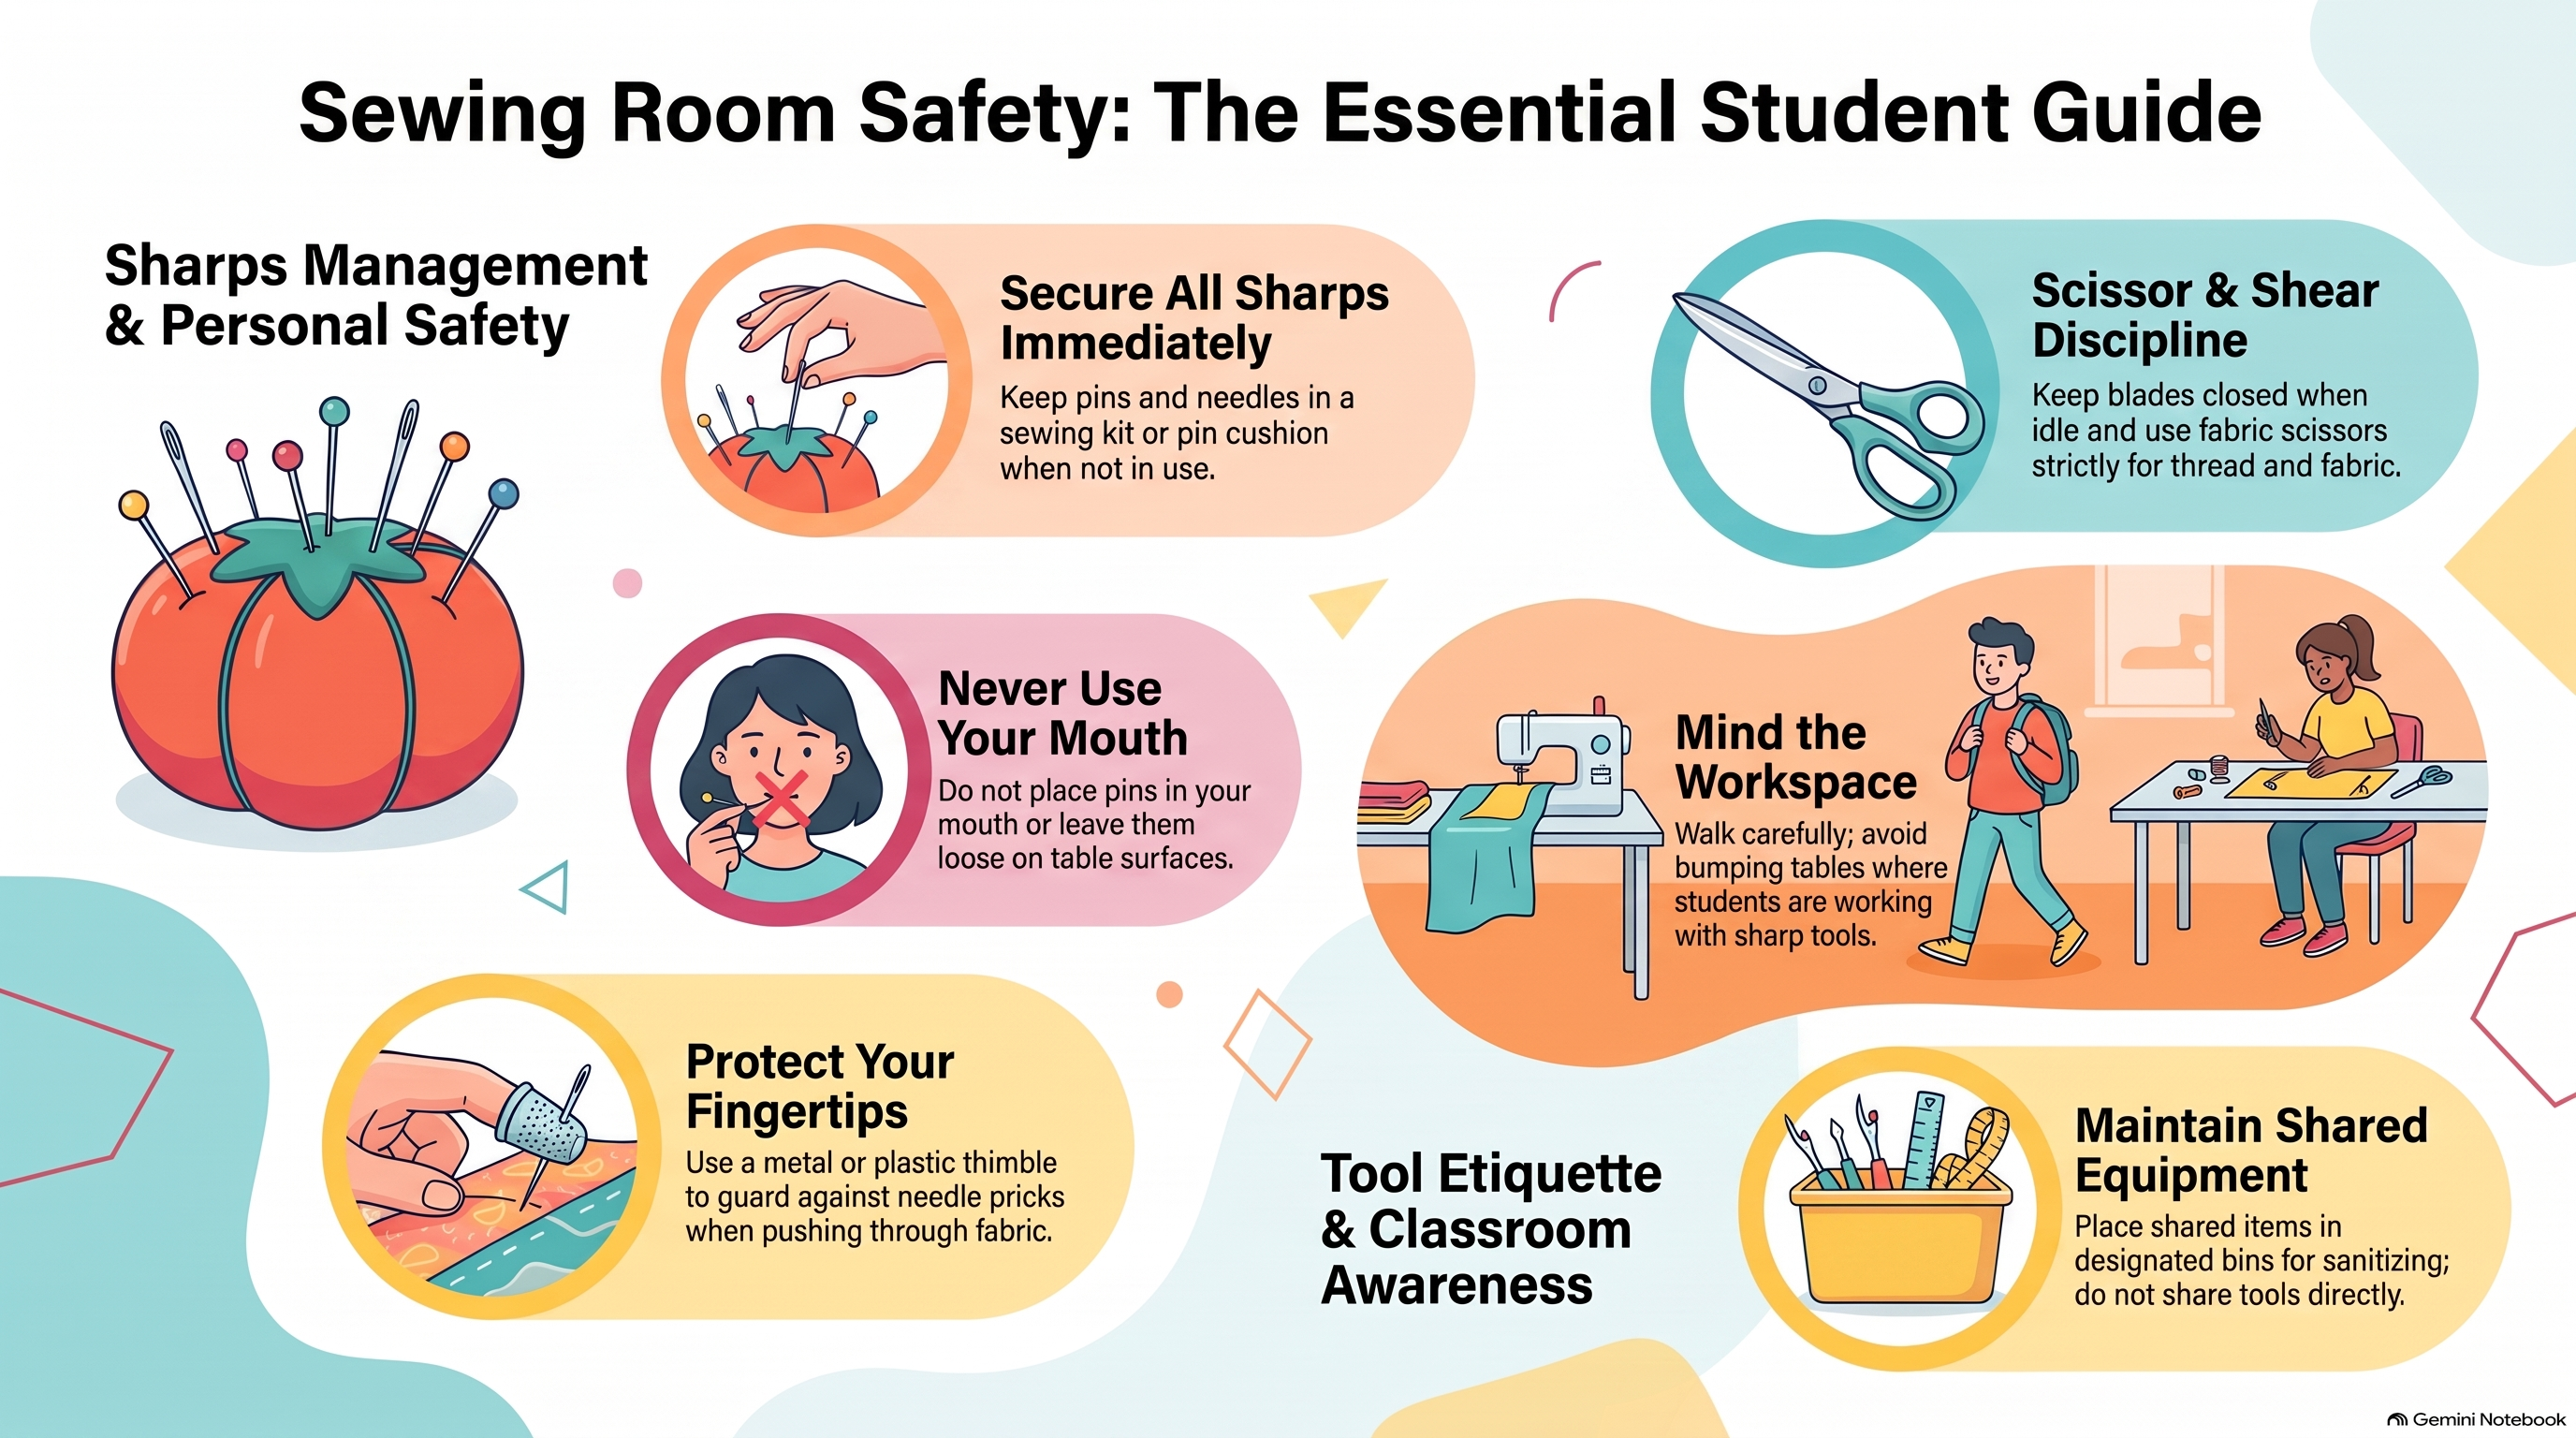
- 6Demonstrate proper needle safety throughout — needles in pin cushion when not actively sewing
Materials
- Felt sheets in your color palette
- Embroidery needle and floss
- Fabric scissors (for fabric only — keep blades closed when idle)
- Your Unit 1 stencil for tracing
- Pins and pin cushion for holding pieces in place
- Thimble
Tips & Techniques
Reference: Sewing Room Safety
Reference: Hand Sewing 101
Lesson Videos
Running Stitch
3 minLearn the running stitch — the most fundamental hand sewing stitch used in appliqué and fabric work.
Back Stitch
4 minMaster the back stitch — a strong, sturdy stitch great for outlining and joining fabric pieces.